Creating hexagonal skill tree
1/7/2025
Martin Bozhilov
In this tutorial, we will explore how to create a visually appealing hexagonal skill tree inspired by the Batman: Arkham Knight game.
This guide will walk you through the process of designing and implementing a skill tree using SVGs, CSS, and JavaScript. By the end of this tutorial, you’ll have a dynamic and interactive skill tree for your game.
Source location
You can find the complete sample source within the ${Gameface package}/Samples/uiresources/UITutorials/HexagonalSkillTree directory.
Preparing the assets
Before we start coding, we need to prepare the assets for our skill tree. The easiest and most performant way to create the hexagons is by using SVGs.
Hexagon SVGs
To create the hexagons, we will head to Figma and design a hexagon shape. We will then export the hexagon as an SVG file.
The simplest way to create a hexagon in Figma is by selecting the polygon option in the creation tool and setting the edges count to 6:
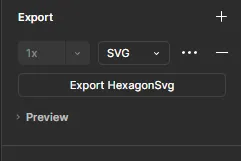
And then exporting it as an SVG file from the bottom right section.
SkillTree background SVG
We will also need a background SVG for the skill tree. This SVG will serve as the base for our skill tree on which we will place the elements.
We will use the hexagon we just created in Figma and duplicate it as many times as we want and after that connecting them with the pen tool.
After you are done with the design, export the background SVG file. Feel free to experiment with the design and create a unique background for your skill tree.
Setting up the project
Let’s begin by setting up the project structure, which includes adding the SVG skill tree we just created and some basic styles.
1<div class="container">2 <div class="skill-container">3 </div>4 <svg class="svg-paths" width="100%" height="100%" viewBox="0 0 1466 1380" xmlns="http://www.w3.org/2000/svg">41 collapsed lines
5 <path d="M820.385 630.74L733.448 582.566L646.063 630.74V729.104L733.448 777.053L820.385 729.104V630.74Z" stroke="white" stroke-width="5"/>6 <path d="M820.385 1186.42L733.448 1138.24L646.063 1186.42V1284.78L733.448 1332.73L820.385 1284.78V1186.42Z" stroke="white" stroke-width="5"/>7 <path d="M819.04 70.5802L732.104 22.4065L644.719 70.5802V168.944L732.104 216.894L819.04 168.944V70.5802Z" stroke="white" stroke-width="5"/>8 <path d="M1033.69 631.188L946.757 583.014L859.372 631.188V729.552L946.757 777.502L1033.69 729.552V631.188Z" stroke="white" stroke-width="5"/>9 <path d="M1248.35 630.291L1161.41 582.118L1074.03 630.291V728.655L1161.41 776.605L1248.35 728.655V630.291Z" stroke="white" stroke-width="5"/>10 <path d="M1463 630.291L1376.06 582.118L1288.68 630.291V728.655L1376.06 776.605L1463 728.655V630.291Z" stroke="white" stroke-width="5"/>11 <path d="M819.041 681.154H858.924" stroke="white" stroke-width="5"/>12 <path d="M1033.69 680.257H1073.58" stroke="white" stroke-width="5"/>13 <path d="M1248.35 680.257H1288.23" stroke="white" stroke-width="5"/>14 <path d="M542.142 445.103L543.891 544.479L629.303 596.07L714.489 546.888L712.322 447.235L627.328 395.921L542.142 445.103Z" stroke="white" stroke-width="5"/>15 <path d="M431.902 259.13L433.651 358.506L519.063 410.097L604.248 360.915L602.082 261.263L517.088 209.948L431.902 259.13Z" stroke="white" stroke-width="5"/>16 <path d="M324.575 73.1568L326.324 172.533L411.736 224.124L496.922 174.942L494.755 75.2894L409.761 23.9748L324.575 73.1568Z" stroke="white" stroke-width="5"/>17 <path d="M692.74 606.015L672.799 571.475" stroke="white" stroke-width="5"/>18 <path d="M582.5 420.042L562.559 385.502" stroke="white" stroke-width="5"/>19 <path d="M475.174 234.069L455.232 199.529" stroke="white" stroke-width="5"/>20 <path d="M843.059 398.273L757.871 449.476L755.898 549.24L841.084 598.422L926.302 546.72L928.245 447.455L843.059 398.273Z" stroke="white" stroke-width="5"/>21 <path d="M950.162 212.301L864.974 263.503L863.001 363.268L948.187 412.45L1033.4 360.747L1035.35 261.483L950.162 212.301Z" stroke="white" stroke-width="5"/>22 <path d="M1064.88 26.3274L979.694 77.53L977.721 177.294L1062.91 226.476L1148.13 174.774L1150.07 75.5094L1064.88 26.3274Z" stroke="white" stroke-width="5"/>23 <path d="M779.004 609.151L798.946 574.611" stroke="white" stroke-width="5"/>24 <path d="M886.107 423.179L906.049 388.639" stroke="white" stroke-width="5"/>25 <path d="M1000.83 237.206L1020.77 202.666" stroke="white" stroke-width="5"/>26 <path d="M432.397 729.328L519.334 777.502L606.719 729.328L606.719 630.964L519.334 583.014L432.397 630.964L432.397 729.328Z" stroke="white" stroke-width="5"/>27 <path d="M217.653 730.224L304.59 778.398L391.975 730.224L391.975 631.86L304.59 583.91L217.653 631.86L217.653 730.224Z" stroke="white" stroke-width="5"/>28 <path d="M2.99986 730.224L89.9366 778.398L177.322 730.224L177.322 631.86L89.9366 583.91L2.99986 631.86L2.99986 730.224Z" stroke="white" stroke-width="5"/>29 <path d="M647.05 679.362H607.167" stroke="white" stroke-width="5"/>30 <path d="M432.306 680.257H392.423" stroke="white" stroke-width="5"/>31 <path d="M217.653 680.257H177.769" stroke="white" stroke-width="5"/>32 <path d="M623.917 963.548L709.105 912.345L711.077 812.581L625.892 763.399L540.674 815.102L538.731 914.366L623.917 963.548Z" stroke="white" stroke-width="5"/>33 <path d="M516.894 1149.48L602.082 1098.28L604.055 998.515L518.869 949.333L433.651 1001.04L431.708 1100.3L516.894 1149.48Z" stroke="white" stroke-width="5"/>34 <path d="M409.632 1335.46L494.82 1284.25L496.793 1184.49L411.607 1135.31L326.389 1187.01L324.446 1286.27L409.632 1335.46Z" stroke="white" stroke-width="5"/>35 <path d="M687.971 752.67L668.03 787.21" stroke="white" stroke-width="5"/>36 <path d="M580.948 938.603L561.007 973.143" stroke="white" stroke-width="5"/>37 <path d="M473.687 1124.58L453.745 1159.12" stroke="white" stroke-width="5"/>38 <path d="M928.116 914.439L926.367 815.062L840.955 763.472L755.769 812.654L757.936 912.306L842.93 963.621L928.116 914.439Z" stroke="white" stroke-width="5"/>39 <path d="M1038.74 1100.41L1036.99 1001.04L951.578 949.445L866.392 998.627L868.559 1098.28L953.553 1149.59L1038.74 1100.41Z" stroke="white" stroke-width="5"/>40 <path d="M1149.94 1286.38L1148.19 1187.01L1062.78 1135.42L977.593 1184.6L979.759 1284.25L1064.75 1335.57L1149.94 1286.38Z" stroke="white" stroke-width="5"/>41 <path d="M777.518 753.526L797.459 788.066" stroke="white" stroke-width="5"/>42 <path d="M888.14 939.5L908.081 974.04" stroke="white" stroke-width="5"/>43 <path d="M999.34 1125.47L1019.28 1160.01" stroke="white" stroke-width="5"/>44 <path d="M499.525 1244.9H643.15M822.85 1244.9H978.798" stroke="white" stroke-width="5"/>45 <path d="M498.181 129.061H641.806M821.505 129.061H977.454" stroke="white" stroke-width="5"/>46 </svg>47</div>1@font-face {2 font-family: 'Nunito';3 src: url(./assets/Nunito-VariableFont_wght.ttf);4}5
6body{7 margin: 0;8 width: 100vw;9 height: 100vh;10 background: linear-gradient(to bottom, #141e30, #243b55);11 overflow: hidden;12 font-family: 'Nunito';13 color: white;14}15
16.container {17 position: absolute;18 right: 0;19 width: 75%;20 height: 140%;21 /* This transition will control the camera movement */22 transition: transform 0.2s linear;23 z-index: -1;24}Skill Tree movement
Since skill trees can be quite big we want to have the skill tree follow the mouse movement.
To achieve this we will add an event listener for the mousemove event and update the transform property of the container element.
We will calculate the percentage of the mouse position relative to the window size and then map it to the desired movement range.
In our case we want the maxium movement to be 10% of the window width and 30% of the window height. So the maximum translateX value will be -10% and the maximum translateY value will be -30%.
1const skillTree = document.querySelector('.container');2const treePaths = document.querySelector('.svg-paths');3
4function translateSkillTreeIntoView(x, y) {5    const percentageX = (x / window.innerWidth) * 100;6    const percentageY = (y / window.innerHeight) * 100;7
8    const mappedX = percentageX * -0.10;9    const mappedY = percentageY * -0.30;10
11    skillTree.style.transform = `translateX(${mappedX.toFixed(2)}%) translateY(${mappedY.toFixed(2)}%)`;12}13
14document.addEventListener('mousemove', (event) => {15    const { clientX, clientY } = event;16
17    translateSkillTreeIntoView(clientX, clientY);18})
You SVG should now follow the mouse movement.
Creating the hexagons
Now that we have the basic structure set up, we can start creating the hexagons that will represent the skills in our skill tree.
1<div class="skill-container">2 <div class="hex">3 <div class="hex-content"></div>4 <svg class="svg svg-main" viewBox="0 0 395 441" fill="none" xmlns="http://www.w3.org/2000/svg">5 <!-- Side 1 -->6 <path d="M198 3.5L392 111" />7 <!-- Side 2 -->8 <path d="M392 111L392 330.5" />9 <!-- Side 3 -->10 <path class="strike-dash" d="M392 330.5L198 437.5" />11 <!-- Side 4 (with stroke-dasharray) -->12 <path d="M198 437.5L3 330.5" />13 <!-- Side 5 -->14 <path d="M3 330.5L3 111" />15 <!-- Side 6 -->16 <path class="strike-dash" d="M3 111L198 3.5" />17 </svg>18 </div>19</div>One thing we changed is the separation of the svg from one path to six path elements for each side and the addition of the strike-dash class to the paths that we want to have a dashed stroke.
We will use this class to apply a dashed stroke to the hexagon sides, creating a unique hexagon shape.
Note: You can easily separate your hexagon svg into six different path elements for each side by provding it to an AI language model and asking it to do so.
1.hex {2 width: 9vw;3 height: 19vh;4 position: absolute;5 transition: all 0.3s ease-in-out;6 display: flex;7 justify-content: center;8 align-items: center;9 cursor: pointer;10}11
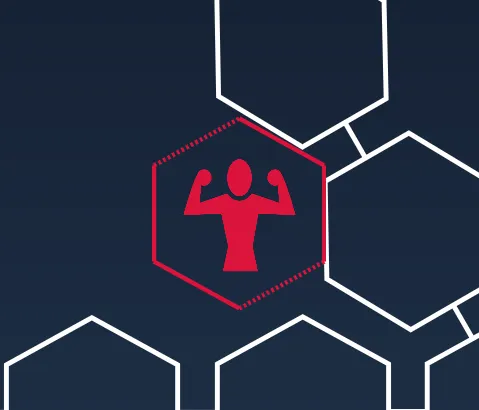
12.hex-content {13 width: 70%;14 height: 70%;15 mask-size: 100%;16 mask-repeat: no-repeat;17 mask-position: center 60%;18 background-color: crimson;19 mask-image: url(./assets/strength/strength-plus.png);20}21
22.hex path {23 stroke: crimson;24}25
26.svg {27 width: 9vw;28 height: 19vh;29 position: absolute;30}31
32.svg-main path {33 stroke-width: 10;34}35
36.strike-dash {37 stroke-dasharray: 6;38}Our hexagon elements will consist of a hexagon SVG as the outline shape of the element and a content div that will hold the skill icon, which will be placed as a mask image. We will leverage the power of CSS masks to create different color icons for the skills while keeping the background transparent.
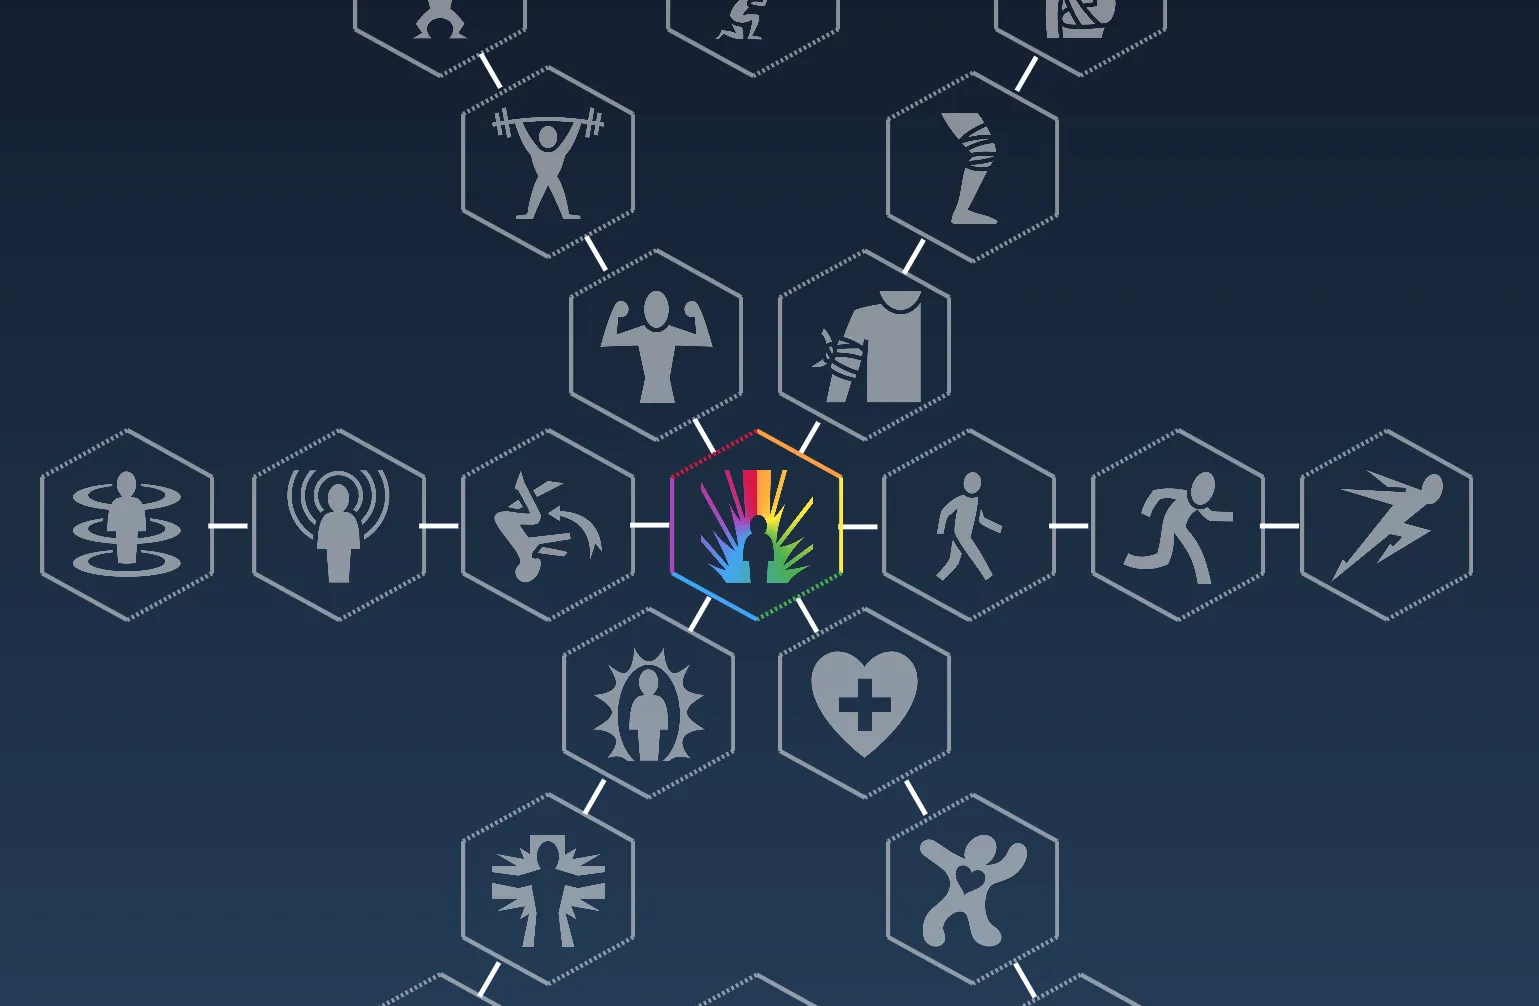
Categorizing the skills
We are going to categorize the skills by their type (strength, durability, health, etc) and apply different colors to the hexagons. We can easily do that by applying different classes to the hexagon elements. And use the classes with the help of CSS variables to apply different colors to the hexagons.
1/* Category colors */2.hex-strength {3 --shadow-color: crimson;4}20 collapsed lines
5
6.hex-durability {7 --shadow-color: #FF9F43;8}9
10.hex-health {11 --shadow-color: #4CAF50;12}13
14.hex-mana {15 --shadow-color: #42A5F5;16}17
18.hex-stamina {19 --shadow-color: #FFEB3B;20}21
22.hex-misc {23 --shadow-color: #AB47BC;24}25
26/* Combined skills */27.hex-strength-durability .path-left-side {28 --shadow-color: crimson;29}30
31.hex-strength-durability .path-right-side {32 --shadow-color: #FF9F43;33}8 collapsed lines
34
35.hex-health-mana .path-left-side {36 --shadow-color: #42A5F5;37}38
39.hex-health-mana .path-right-side {40 --shadow-color: #4CAF50;41}42
43/* LOCKED STATE */44.hex-locked,45.hex-locked .path-left-side,46.hex-locked .path-right-side {47 --shadow-color: #ffffff;48}49
50.hex-locked {51 opacity: 0.5;52}And now simply apply the variable to the svg path element.
1.hex-skill path {2 stroke: var(--shadow-color);3}With this setup we can easily change the color of the hexagons based on the skill type as the --shadow-color variable will take the color from the category class placed on the parent.
Arrange the hexagons on the skill tree
Now that we have the hexagons created, we can start placing them on the skill tree. One way to do it is to manually position each hexagon on the skill tree background SVG
by setting the left and top properties of the hexagon elements untill they fit perfectly.
Mocking game data with a model object
Since we don’t have a game to provide us with the back-end data, we are going to mock some game data that will represent the skills and their relationships. We will create a mock model object that will hold all the information about the skills we need.
1const SkillsModel = {2 points: 24,3 skills: [4 {5 name: 'Health +',6 id: 1,7 description: 'Increase your max health',8 unlocked: false,9 skillPoints: 1,10 image: 'url(./assets/health/health-plus.png)',11 x: '51.5%',12 y: '77vh',13 parents: null,14 type: 'health',15 },207 collapsed lines
16 {17 name: 'Health ++',18 id: 2,19 description: 'Increase your max health',20 unlocked: false,21 skillPoints: 2,22 image: 'url(./assets/health/health-plus-plus.png)',23 x: '59%',24 y: '95.25vh',25 parents: 1,26 type: 'health',27 },28 {29 name: 'Health +++',30 id: 3,31 description: 'Increase your max health',32 unlocked: false,33 skillPoints: 3,34 image: 'url(./assets/health/health-plus-plus-plus.png)',35 x: '66.5%',36 y: '113vh',37 parents: 2,38 type: 'health',39 },40 {41 name: 'Mana +',42 id: 4,43 description: 'Increase your max mana',44 unlocked: false,45 skillPoints: 1,46 image: 'url(./assets/mana/mana-plus.png)',47 x: '36.5%',48 y: '77vh',49 parents: null,50 type: 'mana',51 },52 {53 name: 'Mana ++',54 id: 5,55 description: 'Increase your max mana',56 unlocked: false,57 skillPoints: 2,58 image: 'url(./assets/mana/mana-plus-plus.png)',59 x: '29.5%',60 y: '95.25vh',61 parents: 4,62 type: 'mana',63 },64 {65 name: 'Mana +++',66 id: 6,67 description: 'Increase your max mana',68 unlocked: false,69 skillPoints: 3,70 image: 'url(./assets/mana/mana-plus-plus-plus.png)',71 x: '22%',72 y: '113vh',73 parents: 5,74 type: 'mana',75 },76 {77 name: 'Durability +',78 id: 7,79 description: 'Increase your max durability',80 unlocked: false,81 skillPoints: 1,82 image: 'url(./assets/durability/durability-plus.png)',83 x: '51.5%',84 y: '41.75vh',85 parents: null,86 type: 'durability',87 },88 {89 name: 'Durability ++',90 id: 8,91 description: 'Increase your max durability',92 unlocked: false,93 skillPoints: 2,94 image: 'url(./assets/durability/durability-plus-plus.png)',95 x: '59%',96 y: '24.25vh',97 parents: 7,98 type: 'durability',99 },100 {101 name: 'Durability +++',102 id: 9,103 description: 'Increase your max durability',104 unlocked: false,105 skillPoints: 3,106 image: 'url(./assets/durability/durability-plus-plus-plus.png)',107 x: '66.5%',108 y: '6vh',109 parents: 8,110 type: 'durability',111 },112 {113 name: 'Stamina +',114 id: 10,115 description: 'Increase your max stamina',116 unlocked: false,117 skillPoints: 1,118 image: 'url(./assets/stamina/stamina-plus.png)',119 x: '58.75%',120 y: '59.5vh',121 parents: null,122 type: 'stamina',123 },124 {125 name: 'Stamina ++',126 id: 11,127 description: 'Increase your max stamina',128 unlocked: false,129 skillPoints: 2,130 image: 'url(./assets/stamina/stamina-plus-plus.png)',131 x: '73.25%',132 y: '59.5vh',133 parents: 10,134 type: 'stamina',135 },136 {137 name: 'Stamina +++',138 id: 12,139 description: 'Increase your max stamina',140 unlocked: false,141 skillPoints: 3,142 image: 'url(./assets/stamina/stamina-plus-plus-plus.png)',143 x: '87.75%',144 y: '59.5vh',145 parents: 11,146 type: 'stamina',147 },148 {149 name: 'Strength +',150 id: 13,151 description: 'Increase your max strength',152 unlocked: false,153 skillPoints: 1,154 image: 'url(./assets/strength/strength-plus.png)',155 x: '37%',156 y: '41.75vh',157 parents: null,158 type: 'strength',159 },160 {161 name: 'Strength ++',162 id: 14,163 description: 'Increase your max strength',164 unlocked: false,165 skillPoints: 2,166 image: 'url(./assets/strength/strength-plus-plus.png)',167 x: '29.5%',168 y: '23.75vh',169 parents: 13,170 type: 'strength',171 },172 {173 name: 'Strength +++',174 id: 15,175 description: 'Increase your max strength',176 unlocked: false,177 skillPoints: 3,178 image: 'url(./assets/strength/strength-plus-plus-plus.png)',179 x: '22%',180 y: '6vh',181 parents: 14,182 type: 'strength',183 },184 {185 name: 'Dodge',186 id: 16,187 description: 'Learn dodge ability',188 unlocked: false,189 skillPoints: 1,190 image: 'url(./assets/misc/dodge.png)',191 x: '29.5%',192 y: '59.5vh',193 parents: null,194 type: 'misc',195 },196 {197 name: 'Sixth sense',198 id: 17,199 description: 'Learn the sixth sense ability and increase your awareness',200 unlocked: false,201 skillPoints: 2,202 image: 'url(./assets/misc/sixth-sense.png)',203 x: '15%',204 y: '59.5vh',205 parents: 16,206 type: 'misc',207 },208 {209 name: 'Teleportation',210 id: 18,211 description: 'Learn the teleportation ability and unlock fast travel',212 unlocked: false,213 skillPoints: 3,214 image: 'url(./assets/misc/teleport.png)',215 x: '0.3%',216 y: '59.5vh',217 parents: 17,218 type: 'misc',219 },220 ],221 specialSkills: [222 {223 name: 'Iron Will',224 description: 'Tremendously increases strength and durability',225 unlocked: false,226 skillPoints: 5,227 image: 'url(./assets/combined/iron-will.png)',228 x: '43.75%',229 y: '6vh',230 parents: [15, 9],231 type: 'strength-durability',232 },233 {234 name: 'Arcane Vitality',235 description: 'Tremendously boosts mana regeneration and health recovery',236 unlocked: false,237 skillPoints: 5,238 image: 'url(./assets/combined/arcane-vitality.png)',239 x: '44%',240 y: '113vh',241 parents: [3, 6],242 type: 'health-mana',243 },244 ],245 starterSkill: {246 name: 'Journey Begins',247 description: 'Gain access to the skill tree',248 unlocked: true,249 skillPoints: 0,250 image: 'url(./assets/misc/rubber-man.png)',251 x: '44%',252 y: '59.5vh',253 type: 'starter',254 },255};And we should not forget to initialize the model in our index.js file.
1function updateModel(modelName) {2    engine.updateWholeModel(modelName);3    engine.synchronizeModels();4}5
6engine.on("Ready", () => {7    engine.createJSModel("SkillsModel", SkillsModel);8    engine.synchronizeModels();9});
The model we created has a skills array with objects that contain the skill data, specialSkills array because we have special skills that require multiple skills to be unlocked,
and a starterSkill object that represents the starting skill of the tree which will be unlocked by default.
Since the url for the mask image icons will come from our mocked model, we can remove the placeholder CSS we used previously.
1.hex-content {2    width: 70%;3    height: 70%;4    mask-size: 100%;5    mask-repeat: no-repeat;6    mask-position: center 60%;7    background-color: crimson;8    mask-image: url(./assets/strength/strength-plus.png);9   background-color: var(--shadow-color);10}11
12.hex path {13    stroke: crimson;14}
Now for every category we will create a new class with different color. And also we will add a class for when the skill is locked.
Connecting model data to the html with HTML data-binding
Now that we have the model setup, we can start connecting the data to the HTML elements. We will loop through the skills array and create a hexagon element for each skill
by utilizing the power of data-binding .
Since we have 3 types of skills - starter, normal and combined we will need to handle them separately.
Starter skill
For the starter skill, we will need to extract from the model the x and y coordinates and the image url for the mask image.
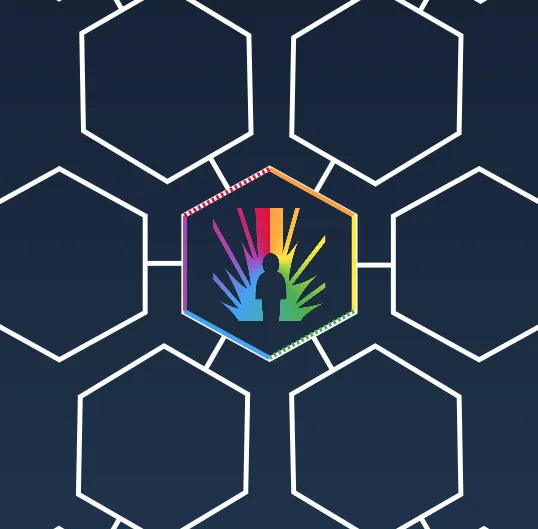
1<div class="skill-container">2 <div3 class="hex hex-starter"4 data-bind-style-top='{{SkillsModel.starterSkill.y}}'5 data-bind-style-left='{{SkillsModel.starterSkill.x}}'>6 <div class="hex-content" data-bind-style-mask-image='{{SkillsModel.starterSkill.image}}'></div>7 <!-- Main -->8 <svg class="svg svg-main" viewBox="0 0 395 441" fill="none" xmlns="http://www.w3.org/2000/svg">9 <!-- Side 1 -->10 <path d="M198 3.5L392 111" stroke="#FF9F43" />11 <!-- Side 2 -->12 <path d="M392 111L392 330.5" stroke="#FFEB3B" />13 <!-- Side 3 -->14 <path class="strike-dash" d="M392 330.5L198 437.5" stroke="#4CAF50"/>15 <!-- Side 4 (with stroke-dasharray) -->16 <path d="M198 437.5L3 330.5" stroke="#42A5F5"/>17 <!-- Side 5 -->18 <path d="M3 330.5L3 111" stroke="#AB47BC" />19 <!-- Side 6 -->20 <path class="strike-dash" d="M3 111L198 3.5" stroke="crimson" />21 </svg>22 </div>23</div>To make our starter skill stand out we will apply a different color to each side of the hexagon. We will use the stroke attribute to apply the color to the sides directly.
1.hex-starter > .hex-content {2 background: conic-gradient(3 #FF9F43 0%,4 #FFEB3B 20%,5 #4CAF50 40%,6 #42A5F5 60%,7 #AB47BC 80%,8 crimson 100%9 );10}And apply a conic gradient as the background, making it all seamlessly integrate with the stroke colors.
With that, we can now see the starter skill placed in the center of our skill tree!
Regular skills
Since we will be looping through the skills array we will need to create a new hexagon element for each skill. We can easily do that with the help of the data-bind-for attribute.
The ohter notable difference from the starter skill logic is that here we will dynamically create the class name based on the skill type, which with the help of the CSS we set up earlier will apply different colors based on the categories of the skills.
And finally, we will use data-bind-class-toggle to conditionally apply the hex-locked class to the hexagon element if the skill is not unlocked.
This will make the hexagon appear grayed out if they are locked.
1<div2 class="hex hex-skill"3 data-bind-for="index, skill:{{SkillsModel.skills}}"4 data-bind-style-top='{{skill.y}}'5 data-bind-style-left='{{skill.x}}'6 data-bind-class="'hex-'+{{skill.type}};'"7 data-bind-class-toggle="hex-locked:{{skill.unlocked}} === false">8 <div class="hex-content" data-bind-style-mask-image='{{skill.image}}'></div>9 <svg class="svg svg-main" viewBox="0 0 395 441" fill="none" xmlns="http://www.w3.org/2000/svg">10 <!-- Side 1 -->11 <path d="M198 3.5L392 111" />12 <!-- Side 2 -->13 <path d="M392 111L392 330.5" />14 <!-- Side 3 -->15 <path class="strike-dash" d="M392 330.5L198 437.5" />16 <!-- Side 4 (with stroke-dasharray) -->17 <path d="M198 437.5L3 330.5" />18 <!-- Side 5 -->19 <path d="M3 330.5L3 111" />20 <!-- Side 6 -->21 <path class="strike-dash" d="M3 111L198 3.5" />22 </svg>23</div>Combined skills
Lastly, we will create a hexagon element for each combined skill. The combined skills will have a different color on both the left and right sides based on the category of the parent skill of each side.
We will achieve that by grouping the left and right sides of the hexagon svg path elements and applying a class to it.
1<div2 class="hex hex-skill"3 data-bind-for="index, skill:{{SkillsModel.specialSkills}}"4 data-bind-style-top='{{skill.y}}'5 data-bind-style-left='{{skill.x}}'6 data-bind-class="'hex-'+{{skill.type}};'"7 data-bind-class-toggle="hex-locked:{{skill.unlocked}} === false">8 <div class="hex-content" data-bind-style-mask-image='{{skill.image}}'></div>9 <!-- Main -->10 <svg class="svg svg-main" data-bind-class="'hex-'+{{skill.type}};'" viewBox="0 0 395 441" fill="none" xmlns="http://www.w3.org/2000/svg">11 <g class="path-right-side">12 <!-- Side 1 -->13 <path d="M198 3.5L392 111" />14 <!-- Side 2 -->15 <path d="M392 111L392 330.5" />16 <!-- Side 3 -->17 <path class="strike-dash" d="M392 330.5L198 437.5" />18 </g>19 <g class="path-left-side">20 <path d="M198 437.5L3 330.5" />21 <!-- Side 5 -->22 <path d="M3 330.5L3 111" />23 <!-- Side 6 -->24 <path class="strike-dash" d="M3 111L198 3.5" />25 </g>26 </svg>27</div>And just as we did with the starter skill, because there will be more than one color for the background, we will add separate styles for the background of the combined skills.
1/* Combined skills colors */2.hex-strength-durability .hex-content {3    background: linear-gradient(to right, crimson 0%, #FF9F43 80%);4}5
6.hex-health-mana .hex-content {7    background: linear-gradient(to right, #42A5F5 0%, #4CAF50 80%);8}9
10/* Locked background */11.hex-locked .hex-content{12    background: #ffffff;13}
And with that we have all the skills placed on the skill tree!
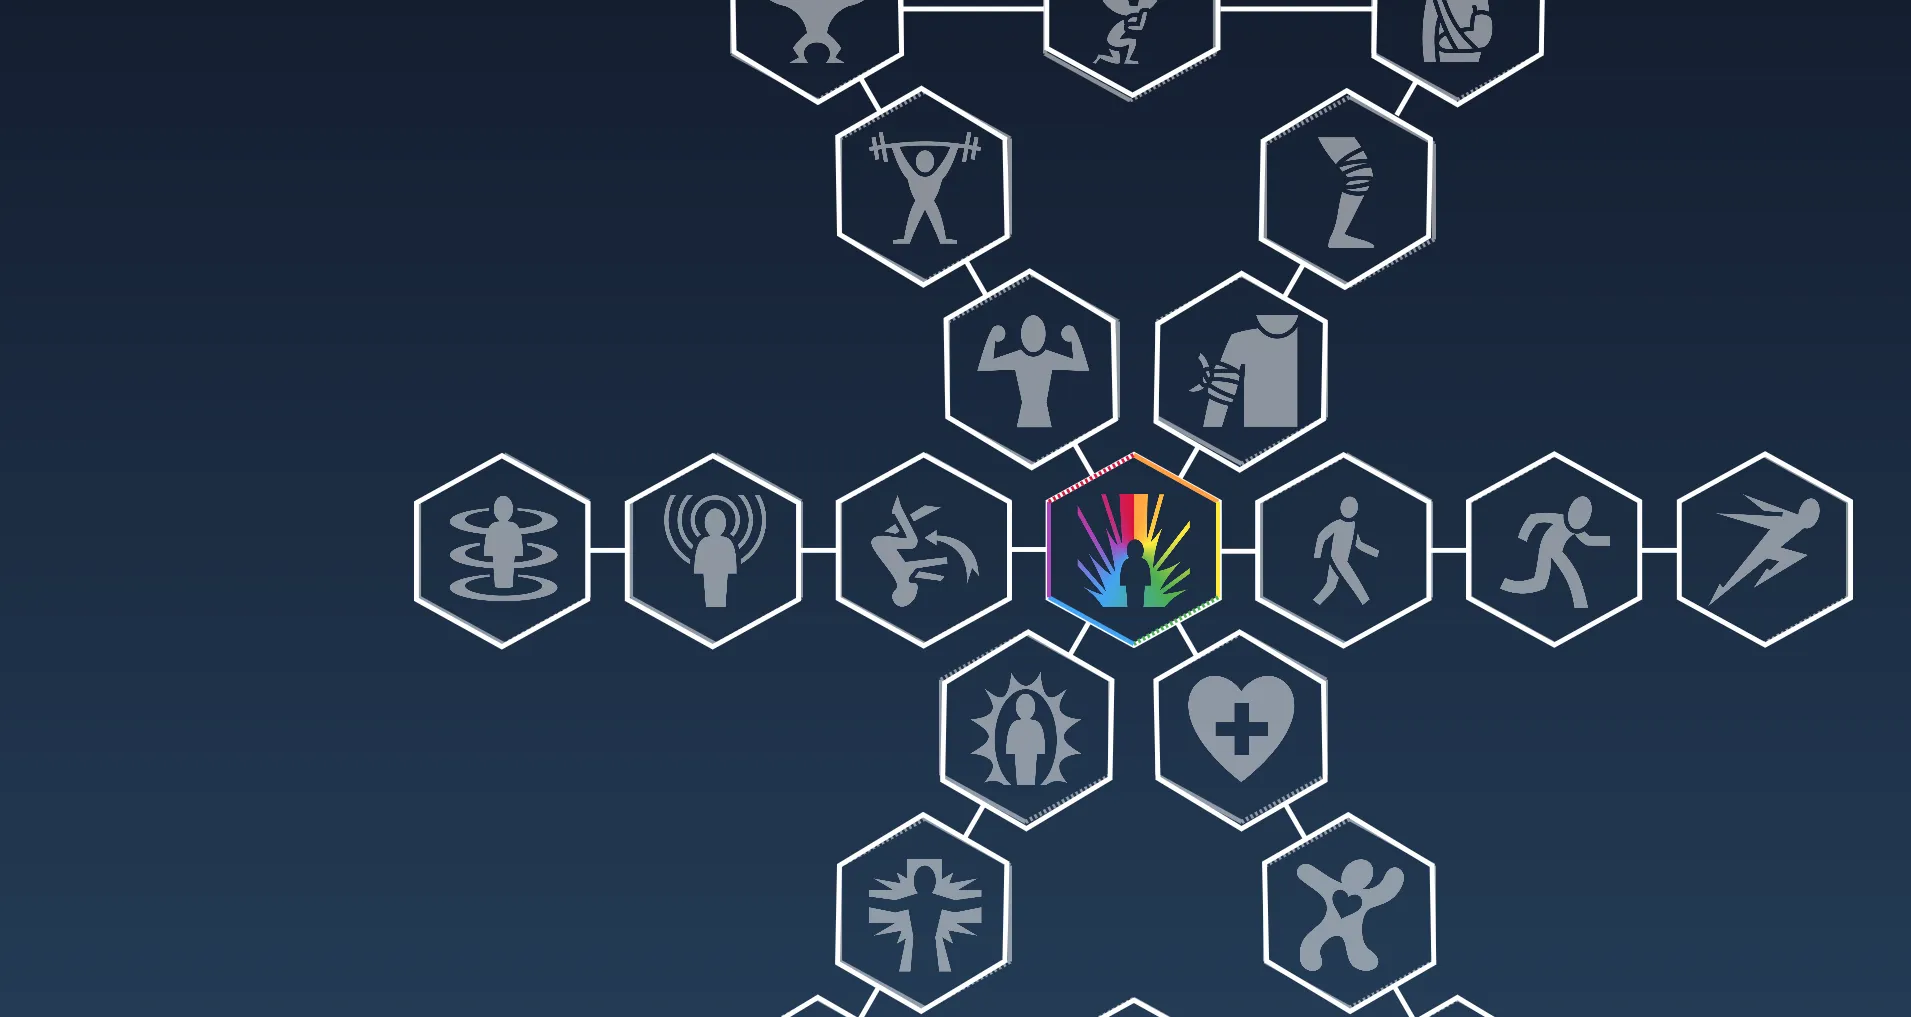
If you comment out the data-bind-class-toggle attribute you will be able to see the color categories
Replacing the skill tree svg
Now that we have all the skills placed on the skill tree, we can remove the hexagons that we placed our elements upon and preserve only the lines connecting them.
Achieving this is very simple, we just need to head to Figma again and export the skill tree without the hexagons.
Adding effects and animations
To make our colorful skill tree even more engaging we can add some effects and animations to the hexagons.
Glow effect
To enhance the visual appeal of the skill tree we can add a glow effect to the hexagons making them more futuristic.
Doing that is very simple, we just need to add a filter property to the svg hexagon element.
1.svg-main {2 filter: drop-shadow(0 0 5px var(--shadow-color)) drop-shadow(0 0 20px var(--shadow-color));3}Each hexagon will now have a glow effect that will change color based on the category of the skill.
We also need to handle the combined skills and the starter skill separately.
1/* Combined skills glow */2.svg-main.hex-strength-durability {3    filter: drop-shadow(0 0 5px #FF9F43) drop-shadow(0 0 5px crimson)4}5
6.svg-main.hex-health-mana {7    filter: drop-shadow(0 0 5px #42A5F5) drop-shadow(0 0 5px #4CAF50)8}9
10/* Only for specificity */11.hex-locked .hex-strength-durability.svg-main,12.hex-locked .hex-health-mana.svg-main {13    filter: drop-shadow(0 0 5px #ffffff) drop-shadow(0 0 5px #ffffff)14}
The starter skill will have a different glow effect. We want each side of the hexagon to have a different glow color. Unfortunately,
we can’t apply filter to a path element, so the approach we will go for is to put 2 of the same SVGs in the hex-content element and blur them, making the effect of a glow.
In the hex-starter element, inside hex-content we will add the following html:
1<div>2 <svg class="svg svg-main svg-starter-glow outer" viewBox="0 0 395 441" fill="none" xmlns="http://www.w3.org/2000/svg">3 <!-- Side 1 -->4 <path d="M198 3.5L392 111" stroke="#FF9F43" />5 <!-- Side 2 -->6 <path d="M392 111L392 330.5" stroke="#FFEB3B" />7 <!-- Side 3 -->8 <path class="strike-dash" d="M392 330.5L198 437.5" stroke="#4CAF50"/>9 <!-- Side 4 (with stroke-dasharray) -->10 <path d="M198 437.5L3 330.5" stroke="#42A5F5"/>11 <!-- Side 5 -->12 <path d="M3 330.5L3 111" stroke="#AB47BC" />13 <!-- Side 6 -->14 <path class="strike-dash" d="M3 111L198 3.5" stroke="crimson" />15 </svg>16 <svg class="svg svg-main svg-starter-glow inner" viewBox="0 0 395 441" fill="none" xmlns="http://www.w3.org/2000/svg">17 <!-- Side 1 -->18 <path d="M198 3.5L392 111" stroke="#FF9F43" />19 <!-- Side 2 -->20 <path d="M392 111L392 330.5" stroke="#FFEB3B" />21 <!-- Side 3 -->22 <path class="strike-dash" d="M392 330.5L198 437.5" stroke="#4CAF50"/>23 <!-- Side 4 (with stroke-dasharray) -->24 <path d="M198 437.5L3 330.5" stroke="#42A5F5"/>25 <!-- Side 5 -->26 <path d="M3 330.5L3 111" stroke="#AB47BC" />27 <!-- Side 6 -->28 <path class="strike-dash" d="M3 111L198 3.5" stroke="crimson" />29 </svg>30</div>And the following CSS:
1.svg-starter-glow {2    filter: blur(10px);3}4
5.svg-starter-glow.outer {6    transform: scale(1.02);7}8
9.svg-starter-glow.inner {10    transform: scale(0.98);11}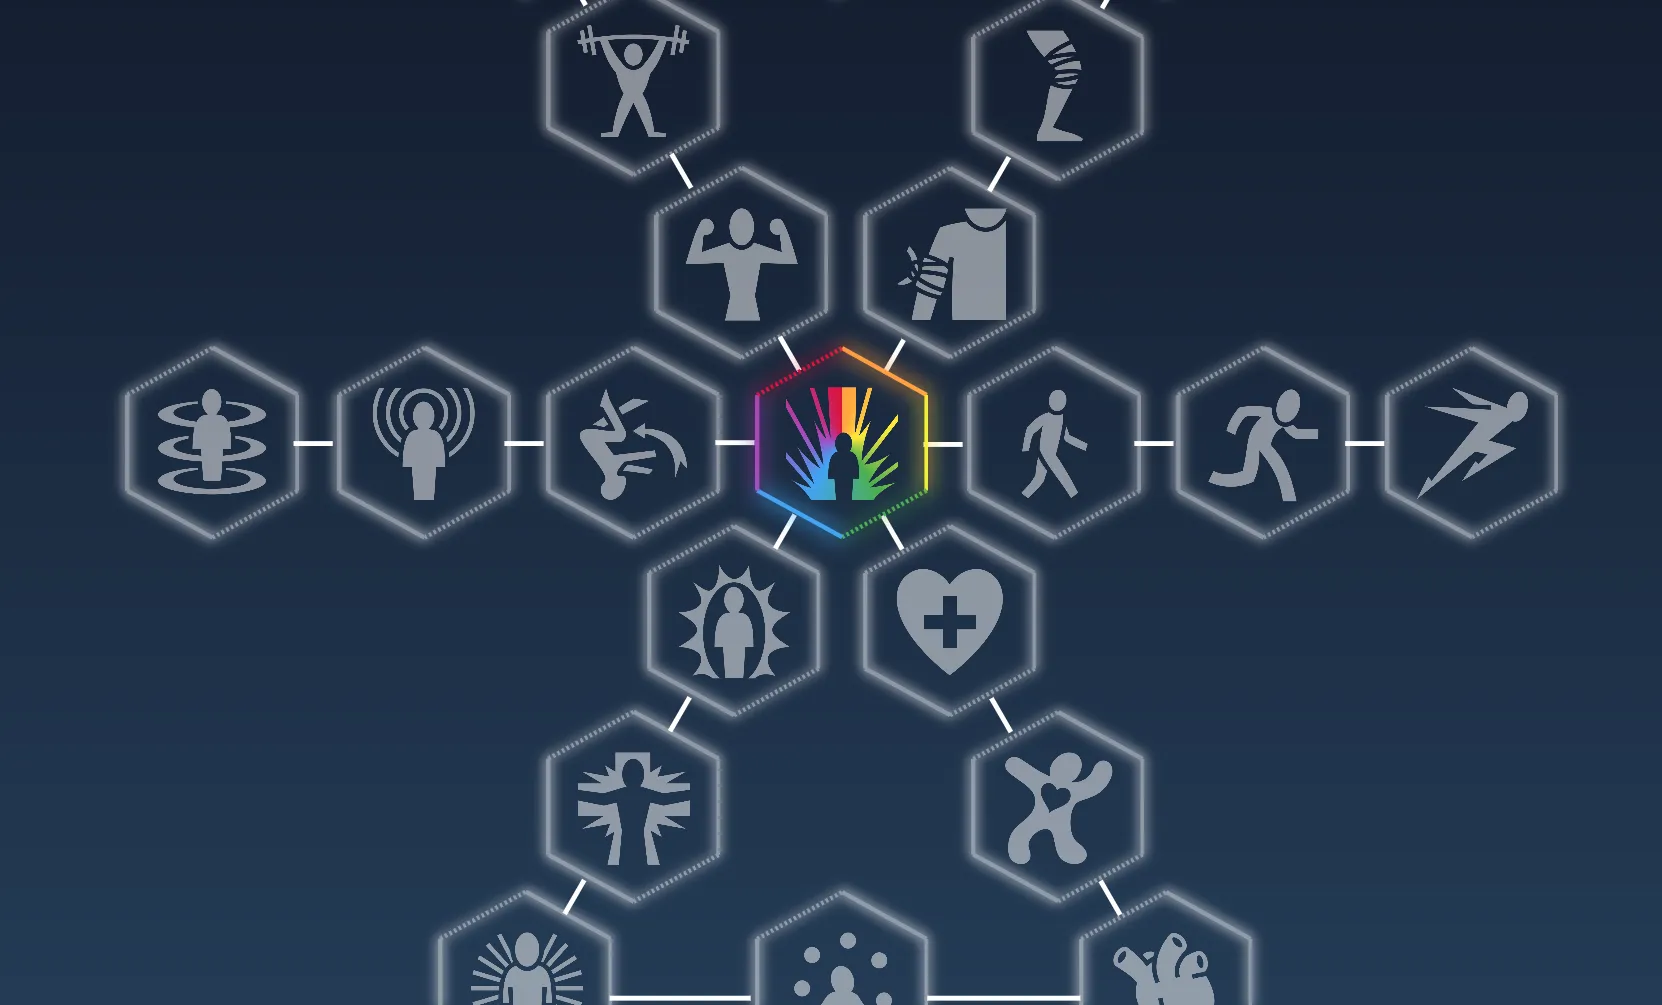
Active skill effect
When a skill is hovered or selected we can add a unique animation making it stand out from the rest:
Let’s begin by firstly modifying the hex elements by adding a couple of SVGs again inside the hex-content element.
To decrease the amount of code, we are going to once again use data-bind-for to render the inner svgs that will be used for the animation.
1engine.on("Ready", () => {2engine.createJSModel("SkillsModel", SkillsModel);3engine.createJSModel("SvgModel", SvgModel);And we should also create the model like so:
1const SvgModel = {2 innerSvgs: [1,2,3],3}Starter hex:
1<!-- Outer -->2<svg class="svg svg-outer" viewBox="0 0 395 441" fill="none" xmlns="http://www.w3.org/2000/svg">12 collapsed lines
3 <!-- Side 1 -->4 <path d="M198 3.5L392 111" stroke="#FF9F43" />5 <!-- Side 2 -->6 <path d="M392 111L392 330.5" stroke="#FFEB3B" />7 <!-- Side 3 -->8 <path d="M392 330.5L198 437.5" stroke="#4CAF50"/>9 <!-- Side 4 (with stroke-dasharray) -->10 <path d="M198 437.5L3 330.5" stroke="#42A5F5"/>11 <!-- Side 5 -->12 <path d="M3 330.5L3 111" stroke="#AB47BC" />13 <!-- Side 6 -->14 <path d="M3 111L198 3.5" stroke="crimson" />15</svg>16
17<!-- Inner -->18<div data-bind-for="svg:{{SvgModel.innerSvgs}}">19 <svg class="svg svg-inner" data-bind-class="'svg-inner-'+{{svg}}" data-bind-class-toggle="selected: {{SkillsModel.starterSkill}} === {{activeState.activeSkill}}" viewBox="0 0 395 441" fill="none" xmlns="http://www.w3.org/2000/svg">11 collapsed lines
20 <path d="M198 3.5L392 111" stroke="#FF9F43" />21 <!-- Side 2 -->22 <path d="M392 111L392 330.5" stroke="#FFEB3B" />23 <!-- Side 3 -->24 <path d="M392 330.5L198 437.5" stroke="#4CAF50"/>25 <!-- Side 4 (with stroke-dasharray) -->26 <path d="M198 437.5L3 330.5" stroke="#42A5F5"/>27 <!-- Side 5 -->28 <path d="M3 330.5L3 111" stroke="#AB47BC" />29 <!-- Side 6 -->30 <path d="M3 111L198 3.5" stroke="crimson" />31 </svg>32</div>Regular skills:
1<svg class="svg  svg-outer" viewBox="0 0 395 441" fill="none" xmlns="http://www.w3.org/2000/svg">2    <path d="M392 111L198 3.5L3 111V330.5L198 437.5L392 330.5V111Z" />3</svg>4
5<!-- Inner -->6<div data-bind-for="svg:{{SvgModel.innerSvgs}}">7    <svg class="svg svg-inner" data-bind-class="'svg-inner-'+{{svg}}" data-bind-class-toggle="selected: {{skill}} === {{activeState.activeSkill}}" viewBox="0 0 395 441" fill="none" xmlns="http://www.w3.org/2000/svg">8        <path d="M392 111L198 3.5L3 111V330.5L198 437.5L392 330.5V111Z"  />9    </svg>10</div>
Combined skills:
1<!-- Outer -->2<svg class="svg svg-outer" viewBox="0 0 395 441" fill="none" xmlns="http://www.w3.org/2000/svg">15 collapsed lines
3 <g class="path-right-side">4 <!-- Side 1 -->5 <path d="M198 3.5L392 111" />6 <!-- Side 2 -->7 <path d="M392 111L392 330.5" />8 <!-- Side 3 -->9 <path d="M392 330.5L198 437.5" />10 </g>11 <g class="path-left-side">12 <path d="M198 437.5L3 330.5" />13 <!-- Side 5 -->14 <path d="M3 330.5L3 111" />15 <!-- Side 6 -->16 <path d="M3 111L198 3.5" />17 </g>18</svg>19
20<!-- Inner -->21<div data-bind-for="svg:{{SvgModel.innerSvgs}}">22 <svg class="svg svg-inner" data-bind-class="'svg-inner-'+{{svg}}" data-bind-class-toggle="selected: {{skill}} === {{activeState.activeSkill}}" viewBox="0 0 395 441" fill="none" xmlns="http://www.w3.org/2000/svg">23 <g class="path-right-side">24 <!-- Side 1 -->25 <path d="M198 3.5L392 111" />26 <!-- Side 2 -->27 <path d="M392 111L392 330.5" />28 <!-- Side 3 -->29 <path d="M392 330.5L198 437.5" />30 </g>31 <g class="path-left-side">32 <path d="M198 437.5L3 330.5" />33 <!-- Side 5 -->34 <path d="M3 330.5L3 111" />35 <!-- Side 6 -->36 <path d="M3 111L198 3.5" />37 </g>38 </svg>39</div>We will now use the svg-outer and svg-inner classes to apply different kinds of animations for each SVG.
Let’s create a second CSS file to put our animations in as to not polute the global one.
1@keyframes inner-shrink-1 {2    0% {3        transform: scale(1);4    }5    100% {6        transform: scale(0.9);7    }8}9
10@keyframes inner-shrink-2 {11    0% {12        transform: scale(0.95);13    }14    100% {15        transform: scale(0.85);16    }17}18
19@keyframes inner-shrink-3 {20    0% {21        transform: scale(0.95);22    }23    100% {24        transform: scale(0.8);25    }26}27
28@keyframes outer-glow {29    0% {30        filter: drop-shadow(0 0 5px rgba(0, 0, 0, 0.51)) blur(5px);31        stroke-width: 10;32        opacity: 1;33    }34
35    25% {36        filter: drop-shadow(0 0 30px rgba(0, 0, 0, 0.51)) blur(15px);37        stroke-width: 50;38    }39
40    90% {41        transform: scale(1.25);42        opacity: 0.25;43        stroke-width: 20;44    }45
46    100% {47        opacity: 0;48        stroke-width: 0;49        transform: scale(1.3);50    }51}
Unfortunately, CSS variables can’t be used in keyframes, so we will have to set some default colors for the animations.
Now let’s add the animations to the hexagons:
1/* Outer shadow */2.selected {3    transform: scale(1.1);4}5
6.svg-outer {7    position: absolute;8    top: 0;9    left: 0;10    display: none;11}12
13.selected .svg-outer {14    animation: outer-glow 1.5s infinite ease-in;15    display: block;16}17
18/* Inner animation svg */19.svg-inner {20    position: absolute;21    top: 0;22    left: 0;23    stroke-width: 4;24    opacity: 0.5;25    display: none;26}27
28.selected.svg-inner {29    display: block;30}31
32.svg-inner-1 {33    animation: inner-shrink-1 0.75s infinite alternate ease-in-out;34}35
36.svg-inner-2 {37    stroke-width: 7;38    opacity: 0.75;39    animation: inner-shrink-2 0.75s infinite alternate ease-in-out;40}41
42.svg-inner-3 {43    animation: inner-shrink-3 0.75s infinite alternate ease-in-out;44}
We added a selected class to apply and run the animations only on the currently selected element.
We can now add the selected class to the hexagon element and its SVGs when it is hovered or clicked. We will again utilize the power of data-binding
to easily attach events to our skill tree items.
For more seаmless state management, we are going to create an observable model which will automatically update when its state changes.
After initialzing it we are going to set its value as our starter skill.
1engine.on("Ready", () => {2 collapsed lines
2 engine.createJSModel("SkillsModel", SkillsModel);3 engine.createJSModel("SvgModel", SvgModel);4 engine.createObservableModel("activeState");5 engine.addSynchronizationDependency(SkillsModel, activeState);6
7 activeState.activeSkill = SkillsModel.starterSkill;Starter skill:
1<div2 class="hex hex-starter"3 data-bind-style-top='{{SkillsModel.starterSkill.y}}'4 data-bind-style-left='{{SkillsModel.starterSkill.x}}'5 data-bind-focus="makeActive(this, {{SkillsModel.starterSkill}})"6 data-bind-class-toggle="selected: {{SkillsModel.starterSkill}} === {{activeState.activeSkill}}"7 data-bind-mouseenter="focusElement(this)"8>Other skills:
1<div2 class="hex hex-skill"3 data-bind-for="index, skill:{{SkillsModel.skills}}"4 data-bind-style-top='{{skill.y}}'5 data-bind-style-left='{{skill.x}}'6 data-bind-focus="makeActive(this, {{skill}})"7 data-bind-mouseenter="focusElement(this)"8 data-bind-class="'hex-'+{{skill.type}};'"9 data-bind-class-toggle="hex-locked:{{skill.unlocked}} === false"10 data-bind-class-toggle="selected: {{skill}} === {{activeState.activeSkill}};hex-locked:{{skill.unlocked}} === false">11>As you can see, we’ve added a data-bind-focus attribute to the hexagon element. This attribute will call the makeActive function when the element is focused.
The makeActive function will expect the DOM element and the skill object from the model as arguments and there we will handle which element is active.
1function focusElement(element) {2    element.focus();3}4
5function makeActive(skillElement, skill) {6    if(skillElement.classList.contains('selected')) return7
8    activeState.activeSkill = skill;9    engine.synchronizeModels();10}
Like that, the code will almost work, what’s left is to make each of our hexagons focusable.
Adding keyboard navigation
We are going to use Gameface’s Interaction manager library and more specifically the Spatial navigation to make our hexagons focusable and to easily extend our sample with keyboard navigation.
After installing it and putting it in our project, what’s left is to initialize it in our index.js file.
1function initSpatialNavigation() {2 interactionManager.spatialNavigation.init(['.hex'], 0.3);3 interactionManager.spatialNavigation.focusFirst();4}Here we say that we want to make all elements with the class hex focusable and that we want to allow a maximum of 30% overlap
between the current item and the others when deciding which element to focus next.
You can find out more about this parameter in the documentation .
The only thing left is to call this function after the model has loaded in the Ready event.
1engine.on("Ready", () => {2 engine.createJSModel("SkillsModel", SkillsModel);3 engine.synchronizeModels();4 initSpatialNavigation();5});And that’s it! Now you can navigate through the hexagons using the keyboard arrows and see the active element animation respond.
Making it all interactive
Now that we have our skill tree set up, we can start making everything interactive and input responsive.
Adding tooltip with skill information
We are going to add a tooltip to display the skill’s information when the user hovers over a skill and a skill points counter to keep track of the available skill points the player has.
The tooltip will consist of the following elements:
- Skill name
- Skill cost
- Skill description
- Unlocked status that will show dynamically based on the skill’s unlocked state.
We are once again going to make use of the observable model that keeps track of the active element. Having this information we can use data-binding to fill out the textContent
of the elements we need with the properties of the currently active element.
1<body>2 <div class="skill-info" data-bind-class-toggle="hex-locked:{{activeState.activeSkill.unlocked}} === false" data-bind-class="'hex-'+{{activeState.activeSkill.type}}">3 <h1 class="skill-name" data-bind-value="{{activeState.activeSkill.name}}" ></h1>4 <div class="skill-price" data-bind-value="'Skill cost'+' '+{{activeState.activeSkill.skillPoints}}" data-bind-class-toggle="hidden:!{{activeState.activeSkill.skillPoints}}"></div>5 <div class="skill-description" data-bind-value="{{activeState.activeSkill.description}}"></div>6 <div style="overflow: hidden;">7 <div class="skill-status" data-bind-class-toggle="unlocked:{{activeState.activeSkill.unlocked}}">unlocked</div>8 </div>9 </div>10 <div class="container">Now to add the styles
1.skill-info {2 position: absolute;3 top: 2.5%;4 left: 1%;5 padding: 1.5vmax 1.25vmax;6 width: 30%;7 background: rgba(0, 0, 0, 0.8);8 color: white;9 border-radius: 10px;10 box-shadow: 0 0 20px 3px var(--shadow-color);11 transition: box-shadow 0.5s;12}13
14.hex-locked.skill-info {15 opacity: 0.8;122 collapsed lines
16}17
18.hex-starter.skill-info,19.hex-strength-durability.skill-info,20.hex-health-mana.skill-info {21 background-color: black;22}23
24.hex-strength-durability.skill-info {25 --shadow-color: crimson;26 --shadow-color-2: #FF9F43;27}28
29.hex-health-mana.skill-info {30 --shadow-color: #42A5F5;31 --shadow-color-2: #4CAF50;32}33
34/* Reset for locked state */35.hex-locked.skill-info {36 --shadow-color: #FFF;37}38
39.hex-starter.skill-info::before,40.hex-strength-durability.skill-info::before,41.hex-health-mana.skill-info::before {42 content: '';43 position: absolute;44 top: -5px;45 left: -5px;46 right: -5px;47 bottom: -5px;48 z-index: -1;49 border-radius: 10px;50 filter: blur(10px);51 background-image: linear-gradient(to right, var(--shadow-color), var(--shadow-color-2));52}53
54.hex-starter.skill-info::before {55 background: linear-gradient(to right, #FF9F43, #FFEB3B, #4CAF50, #42A5F5, #AB47BC, crimson);56}57
58/* Reset for locked state */59.hex-locked.skill-info::before {60 background-image: none;61}62
63.skill-name {64 border-bottom: 2px solid rgba(255, 255, 255, 0.5);65 font-size: 1.6vmax;66 margin: 0;67 margin-bottom: 1vmax;68 padding-bottom: 1vmax;69 text-transform: uppercase;70}71
72.skill-price {73 text-transform: uppercase;74 font-size: 1.7vmax;75 margin-bottom: 1vmax;76 color: var(--shadow-color);77 filter: drop-shadow(0 0 10px var(--shadow-color));78 transition: filter 0.5s, color 0.5s;79}80
81.skill-price.hidden {82 display: none;83}84
85.skill-description {86 font-size: 0.9vmax;87}88
89.skill-points {90 position: absolute;91 bottom: 2.5%;92 left: 1%;93 display: flex;94 font-size: 3vmax;95}96
97.skill-status {98 color: white;99 letter-spacing: 10px;100 font-size: 1.2vmax;101 text-transform: uppercase;102 text-align: center;103 margin-top: 2vmax;104 position: relative;105 transform: translateX(-100%);106 opacity: 0;107 transition: transform 0.3s, opacity 0.3s;108}109
110.skill-status.unlocked {111 transform: translate(0);112 opacity: 1;113}114
115.skill-status::before {116 content: '';117 position: absolute;118 top: 0;119 left: 0;120 width: 100%;121 height: 100%;122 background-color: var(--shadow-color);123 opacity: 0.5;124 z-index: -1;125 border: 1px solid white;126 transition: background-color 0.5s;127}128
129/* starter skill status */130.hex-starter .skill-status::before {131 background: linear-gradient(to right, #FF9F43, #FFEB3B, #4CAF50, #42A5F5, #AB47BC, crimson);132}133
134/* Combined skills status */135.hex-strength-durability .skill-status::before,136.hex-health-mana .skill-status::before {137 background-image: linear-gradient(to right, var(--shadow-color), var(--shadow-color-2));138}The idea is to have the tooltip correspond to the skill category and also have a glow effect. We achieved this by using box shadows for the regular skills and linear gradients for the starter and combined skills.
Now when you hover over a skill, you will see the tooltip with the skill’s information dynamically updating upon interaction.
Adding skill unlock functionality
In order to make the interaction with the skill tree more engaging, we will make the paths connecting the skills fill with the corresponding color of the skill’s category when a skill is unlocked.
We will slightly modify the SVG paths by giving them category classes, as well as a class that will help us keep track of which path corresponds to which skill of the category, essentially making each path have a unique class that will help us identify when to color its stroke.
1<svg class="svg-paths" width="100%" height="100%" viewBox="0 0 1466 1380" fill="none" xmlns="http://www.w3.org/2000/svg">2 <path class="hex-path hex-locked hex-stamina stamina-1" d="M816.041 681.154H855.924" stroke-width="5"/>3 <path class="hex-path hex-locked hex-stamina stamina-2" d="M1030.69 680.257H1070.58" stroke-width="5"/>4 <path class="hex-path hex-locked hex-stamina stamina-3" d="M1245.35 680.257H1285.23" stroke-width="5"/>5 <path class="hex-path hex-locked hex-strength strength-1" d="M689.74 606.015L669.799 571.475" stroke-width="5"/>6 <path class="hex-path hex-locked hex-strength strength-2" d="M579.5 420.042L559.559 385.502" stroke-width="5"/>7 <path class="hex-path hex-locked hex-strength strength-3" d="M472.174 234.069L452.232 199.529" stroke-width="5"/>8 <path class="hex-path hex-locked hex-durability durability-1" d="M776.004 609.151L795.946 574.611" stroke-width="5"/>9 <path class="hex-path hex-locked hex-durability durability-2" d="M883.107 423.179L903.049 388.639" stroke-width="5"/>10 <path class="hex-path hex-locked hex-durability durability-3" d="M997.828 237.206L1017.77 202.666" stroke-width="5"/>11 <path class="hex-path hex-locked hex-misc misc-1" d="M644.05 679.362H604.167" stroke-width="5"/>12 <path class="hex-path hex-locked hex-misc misc-2" d="M429.306 680.257H389.423" stroke-width="5"/>13 <path class="hex-path hex-locked hex-misc misc-3" d="M214.653 680.257H174.769" stroke-width="5"/>14 <path class="hex-path hex-locked hex-mana mana-1" d="M684.971 752.67L665.03 787.21" stroke-width="5"/>15 <path class="hex-path hex-locked hex-mana mana-2" d="M577.948 938.603L558.007 973.143" stroke-width="5"/>16 <path class="hex-path hex-locked hex-mana mana-3" d="M470.687 1124.58L450.745 1159.12" stroke-width="5"/>17 <path class="hex-path hex-locked hex-health health-1" d="M774.518 753.526L794.459 788.066" stroke-width="5"/>18 <path class="hex-path hex-locked hex-health health-2" d="M885.14 939.5L905.081 974.04" stroke-width="5"/>19 <path class="hex-path hex-locked hex-health health-3" d="M996.34 1125.47L1016.28 1160.01" stroke-width="5"/>20 <path class="hex-path hex-locked hex-mana health-mana" d="M496.525 1244.9H640.15" stroke-width="5"/>21 <path class="hex-path hex-locked hex-health health-mana" d="M819.85 1244.9H975.798" stroke-width="5"/>22 <path class="hex-path hex-locked hex-strength strength-durability" d="M495.181 129.061H638.806" stroke-width="5"/>23 <path class="hex-path hex-locked hex-durability strength-durability" d="M818.505 129.061H974.454" stroke-width="5"/>24</svg>Let’s apply the styles to the paths, as well as handle the transition for when the stroke is filled.
1.hex-path {2 stroke: var(--shadow-color);3 transition: all 0.3s ease-in;4}With that out of the way we are now ready to combine the skill unlock functionality with the skill tree.
In the index.js file we will add an unlockSkill function that will handle all the logic.
1function unlockSkill(skillElement, skill, combined = false) {2    const {type, skillPoints, parents, unlocked} = skill;3
4    skillElement.focus();5
6    if (unlocked) return;7
8    if(skillPoints > SkillsModel.points || !isSkillValid(parents, skill)) {9        return;10    };11
12    skillElement.classList.remove('hex-locked');13    SkillsModel.points -= skillPoints;14    skill.unlocked = true;15
16    updateModel(SkillsModel);17
18    if(combined) {19        const paths = skillTree.querySelectorAll(`.${type}`);20        if (paths) paths.forEach((path) => path.classList.remove('hex-locked'));21    } else {22        const path = skillTree.querySelector(`.${type}-${skillPoints}`);23        if (path) path.classList.remove('hex-locked');24    }25}26
27
28function isSkillValid(parents, skill) {29    if(parents === null) return true;30
31    if (Array.isArray(parents)) return skill.parents.every((parentId) => SkillsModel.skills[parentId - 1].unlocked);32
33    return SkillsModel.skills[skill.parents - 1].unlocked;34}
In the unlockSkill function we do the following:
- Check if the skill is already unlocked
- Check if the player has enough skill points to unlock the skill
- Check if the skill’s parent is unlocked
- If all the conditions are met, we set the unlocked field in the model to true, update the model, and remove the
hex-lockedclass from the skill element and the corresponding path to fill the svg’s path with color.
We also added the isSkillValid helper function that will help us determine if the skill’s is valid for unlocking.
- Normal skill is considered valid if the parent is unlocked
- Combined skill is considered valid if both parents are unlocked
Lastly we need to connect the unlockSkill function with our hexagon elements. The logic for unlocking will trigger when the element is clicked or the key ‘Enter’ is pressed.
5 collapsed lines
1<div2 class="hex hex-skill"3 data-bind-for="index, skill:{{SkillsModel.skills}}"4 data-bind-style-top='{{skill.y}}'5 data-bind-style-left='{{skill.x}}'6 data-bind-click="unlockSkill(this, {{skill}})"7 data-bind-keypress="handleKeyPress(this, event, {{skill}})"4 collapsed lines
8 data-bind-focus="makeActive(this, {{skill}})"9 data-bind-mouseenter="focusElement(this)"10 data-bind-class="'hex-'+{{skill.type}};'"11 data-bind-class-toggle="hex-locked:{{skill.unlocked}} === false">For the combined skills, it’s the same as the regular skills, but we need to pass an additional argument to the unlockSkill function to indicate that the skill is combined.
5 collapsed lines
1<div2 class="hex hex-skill"3 data-bind-for="index, skill:{{SkillsModel.skills}}"4 data-bind-style-top='{{skill.y}}'5 data-bind-style-left='{{skill.x}}'6 data-bind-click="unlockSkill(this, {{skill}}, true)"7 data-bind-keypress="handleKeyPress(this, event, {{skill}}, true)"4 collapsed lines
8 data-bind-focus="makeActive(this, {{skill}})"9 data-bind-mouseenter="focusElement(this)"10 data-bind-class="'hex-'+{{skill.type}};'"11 data-bind-class-toggle="hex-locked:{{skill.unlocked}} === false">Lastly, we need to handle the key press event for the ‘Enter’ key within the handleKeyPress function. Its logic is simple - if the ‘Enter’ key is pressed, we call the unlockSkill function.
1function handleKeyPress(skillElement, event, skill, combined = false) {2    if(event.charCode !== 13) return3
4    unlockSkill(skillElement, skill, combined)5}
And that’s it! Now you can interact with the skill tree by unlocking the skills and seeing the paths, skills and the tooltip fill with color.
Adding error Handling
As you have probably noticed, clicking on a skill that is locked and doesn’t meet the requirements will not show a visual cue.
We should notify the player that the skill can’t be unlocked and why. We will add a subtle locked animation to the skill element and display an error message.
For displaying the error message, we will use Gameface’s toast component.
Click if unsure how to add it to your project
First, we need to install it.
1npm i coherent-gameface-toastAfter installing it, we need to add the toast component to our project. Let’s first add the toast’s styles.
We will add them before our custom styles, so they can be easily overwritten.
1<link rel="stylesheet" href="./node_modules/coherent-gameface-toast/coherent-gameface-components-theme.css">2<link rel="stylesheet" href="./node_modules/coherent-gameface-toast/style.css">3<link rel="stylesheet" href="styles.css">4<link rel="stylesheet" href="animations.css">And the toast’s script
1<script src="cohtml.js"></script>2<script src="model.js"></script>3<script src="node_modules/coherent-gameface-interaction-manager/dist/interaction-manager.min.js"></script>4<script src="./node_modules/coherent-gameface-toast/dist/toast.production.min.js"></script>5<script src="index.js"></script>Let’s add the toast to our index.html file.
1<body>2<gameface-toast class="toast-slide-in" position="top-right" timeout="3000">3 <div slot="message">4 <div class="error-message-header">Can't unlock</div>5 <div class="error-message"></div>6 </div>7</gameface-toast>Now let’s customize the toast’s styles to fit the theme of our project.
1/* Error message */2.guic-toast-container {3    overflow: visible;4}5
6.toast-slide-in {7    animation-name: slide-in;8    animation-duration: 0.5s;9}10
11.toast-slide-in-retrigger {12    animation-name: slide-in-retrigger;13    animation-duration: 0.5s;14}15
16.guic-toast-hide {17    animation-name: guic-toast-fade-out;18}19
20.guic-toast {21    background: rgba(0, 0, 0, 0.8);22    color: white;23    border-radius: 10px;24    box-shadow: 0 0 20px 3px crimson;25    padding: 0.2vmax;26}27
28.guic-toast-message {29    padding: 0.5vmax;30}31
32.error-message-header {33    background-color: rgba(220, 20, 60, 0.5);34    padding: 0.3vmax 0.5vmax;35    margin-bottom: 0.3vmax;36    text-transform: uppercase;37    border: 1px solid white;38}39
40/* disable since we are not using it */41.guic-toast-close-btn {42    display: none;43}
And add a custom slide-in animation for the toast, overwritting the default one.
1@keyframes slide-in {2    0% {3        transform: translateX(50vmax);4    }5    50% {6        transform: translateX(-5vmax);7    }8    100% {9        transform: translateX(0%);10    }11}12
13@keyframes slide-in-retrigger {14    0% {15        transform: translateX(50vmax);16    }17    50% {18        transform: translateX(-5vmax);19    }20    100% {21        transform: translateX(0%);22    }23}
The reason we added 2 animation that do the same thing is because we want to be able to retrigger the animation if the toast needs to be shown again before the previous one has finished.
Now let’s add the logic for showing the error message.
1const toast = document.querySelector('gameface-toast');2const toastMessage = toast.querySelector('.error-message');3
4function showErrorMessage(skillPoints) {5    toastMessage.textContent = skillPoints > SkillsModel.points ? 'Not enough skill points' : 'Parent skill not unlocked';6    if(toast.visible) {7        toast.classList.toggle('toast-slide-in');8        toast.classList.toggle('toast-slide-in-retrigger');9    }10
11    toast.show();12}
The other visual indicator for invalid operation is the locked animation on the skill element. We will add a simple animation that will make the skill element shake when the player tries to unlock a locked skill.
1@keyframes shake {2    25% {3        transform: translateX(2.5%);4    }5
6    50% {7        transform: translateX(-2.5%);8    }9}
Apply it to the hex elements
1.hex.shake{2 animation: shake 0.5s ease-in-out;3}What’s left is to add a function to trigger the animation and combine it with the toast error message in the unlockSkill function.
1if (skillPoints > SkillsModel.points || !isSkillValid(parents, skill)) {2    showErrorMessage(skillPoints);3    triggerLockedAnimation(skillElement);4    return;5};6
7function triggerLockedAnimation(skillElement) {8    skillElement.classList.add('shake');9    setTimeout(() => skillElement.classList.remove('shake'), 500);10}
Now we have a fully interactive skill tree with error handling and visual cues for the player!
Quality of life improvements
Our skill tree is almost complete, but there is one quality of life improvement we can add to make the experience even better.
Currenly, if the player decided to navigate the tree using only the keyboard, the screen won’t follow them like it would if they were using the mouse.
We can fix this by enhancing the makeActive function by calling the translateSkillTreeIntoView function and providing it with the coordinates of the active skill.
1function makeActive(skillElement, skill) {2    if(skillElement.classList.contains('selected')) return3
4    activeState.activeSkill = skill;5    engine.synchronizeModels();6
7    const skillRect = skillElement.getBoundingClientRect();8    const skillTreeRect = skillTree.getBoundingClientRect();9
10    // Coordinates relative to the skill tree11    const x = skillRect.x - skillTreeRect.x;12    const y = skillRect.y - skillTreeRect.y;13
14    translateSkillTreeIntoView(x, y);15}
In order to properly calculate the correct x and y coordinates, we have to subtract the position of the skill element from the position of the skill tree. That way we get the correct coordinates relative to the viewport and not the tree SVG.
And with that our skill tree is complete!