How to create a Fish-eyed using a curved plane
2/9/2025
Mihail Todorov
A well-designed HUD can enhance a player’s immersion, and a fish-eye effect can add a dynamic, stylized look to your game. Whether you’re aiming for a futuristic, distorted interface or a more subtle curved display, this guide will walk you through the techniques needed to implement a fish-eye HUD .
In this tutorial, we’ll explore a method to create a curved HUD using Gameface’s in-world UIs. This technique allows us to project our UI onto any three-dimensional surface. Specifically, we’ll design a curved plane that distorts the UI to create a fish-eye effect.
Setting up our game
We’ll start with Unreal’s Base Third Person game template and reposition the camera to align with the character’s head. This setup allows us to seamlessly switch between first-person and third-person perspectives. While our focus is on this dual-view approach, you can easily adapt the technique for a dedicated first-person shooter (FPS) game as well.
Next we need to integrate Coherent Gameface into our game. We can do that by following the getting started guide from our documentation.
Adding the CoHTML Plane to our character
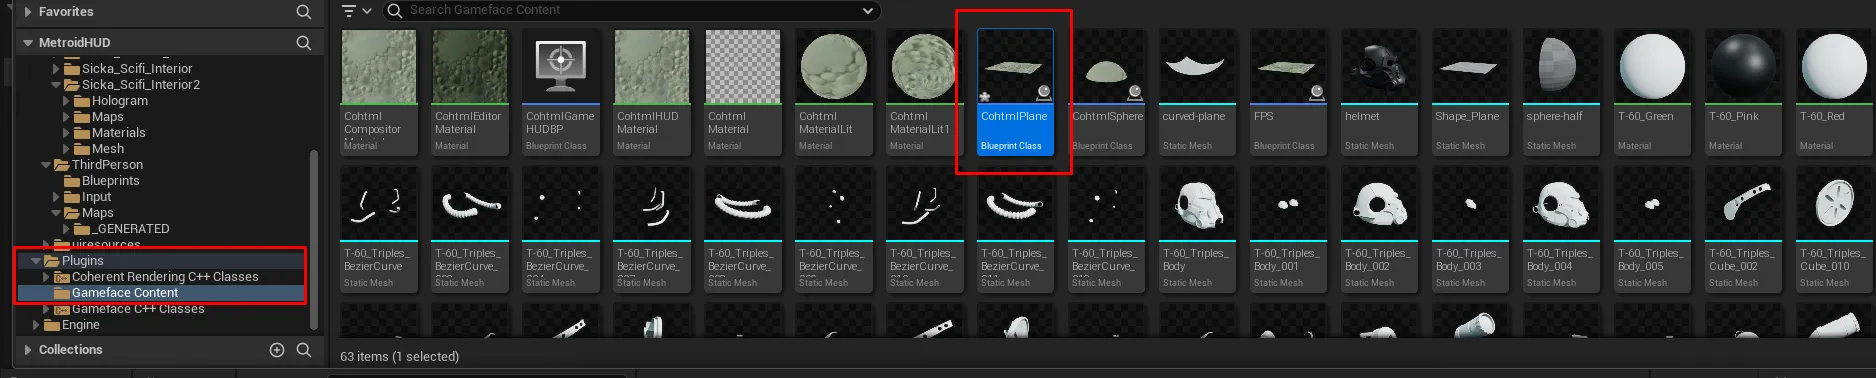
Next, we’ll add the CoHTML Plane to our character. Open the content drawer and navigate to Plugins > Gameface Content > CohtmlPlane:
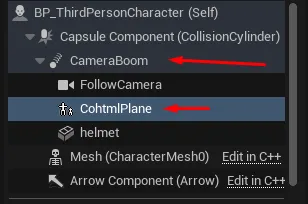
Since creating an instance of the Blueprint Class within another Blueprint Class isn’t possible, we’ll simply duplicate the CohtmlPlane class. And then drag and drop it into our ThirdPersonCharacter Blueprint:
Ensure that it is added as a child of the CameraBoom component, so it follows the camera’s movements:
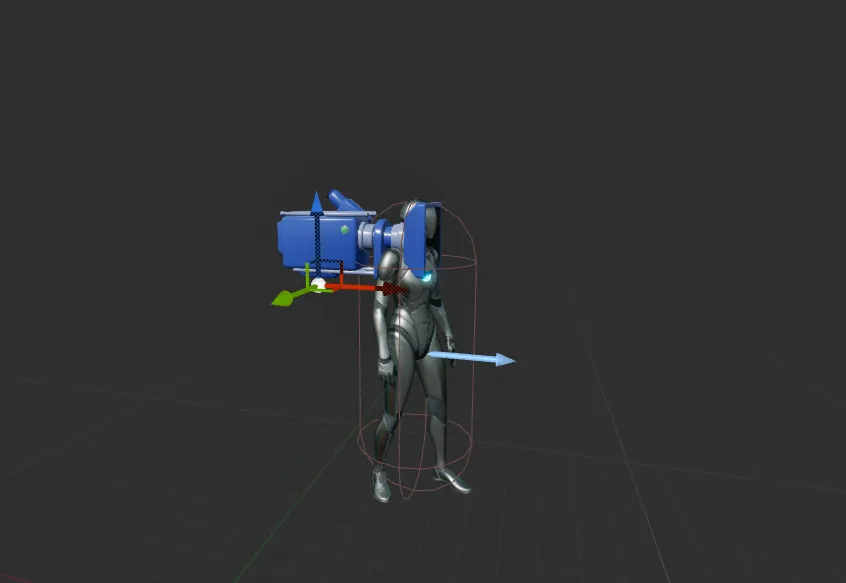
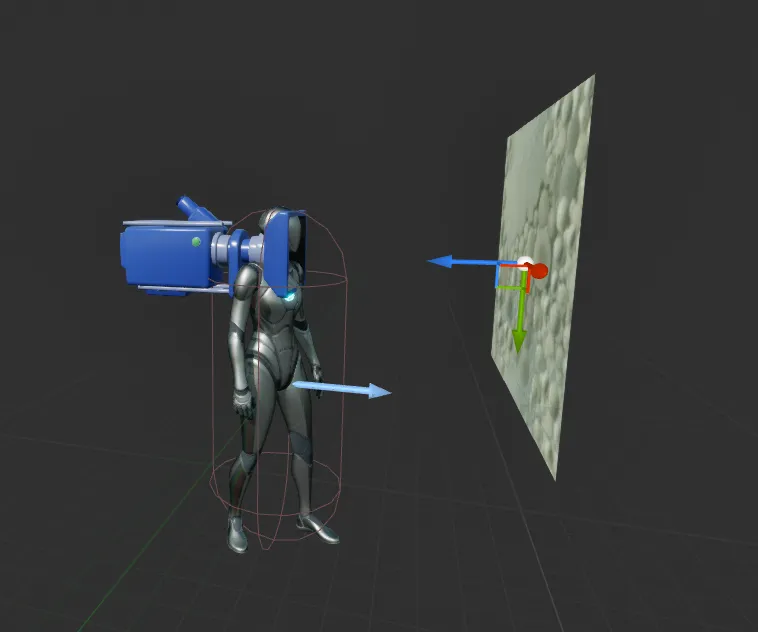
When we run the game, we should see our plane positioned in front of the camera. Depending on how accurately we’ve placed it within the Blueprint Class, we might need to make some adjustments to achieve the desired positioning.
Changing the plane mesh
To achieve the fish-eye effect, we need to modify the mesh of our CohtmlPlane to be a curved plane. We’ll create a new plane in Blender and use modifiers to bend it. You can follow this tutorial for detailed instructions.
In our case, we’ll bend the plane along both the X and Z axes to achieve the desired curvature.
Once the modifications are complete, export the plane as an FBX file. Then, import it into your content drawer by dragging and dropping the file.
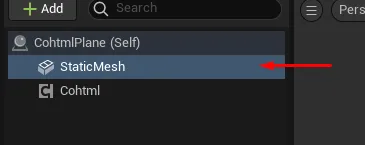
Next, double-click on the duplicated Blueprint Class for the plane. Inside, select the StaticMesh component.
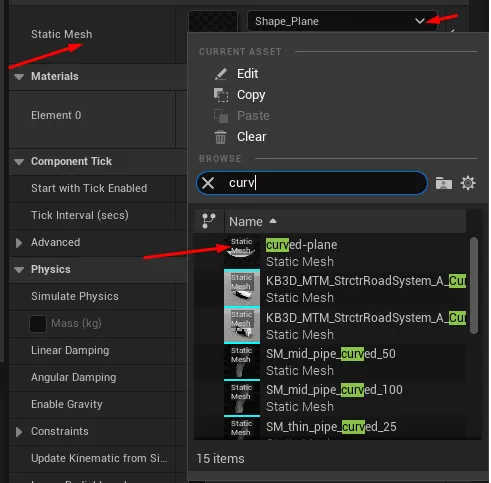
In the settings panel on the right, locate the Static Mesh option and select the newly imported curved mesh.
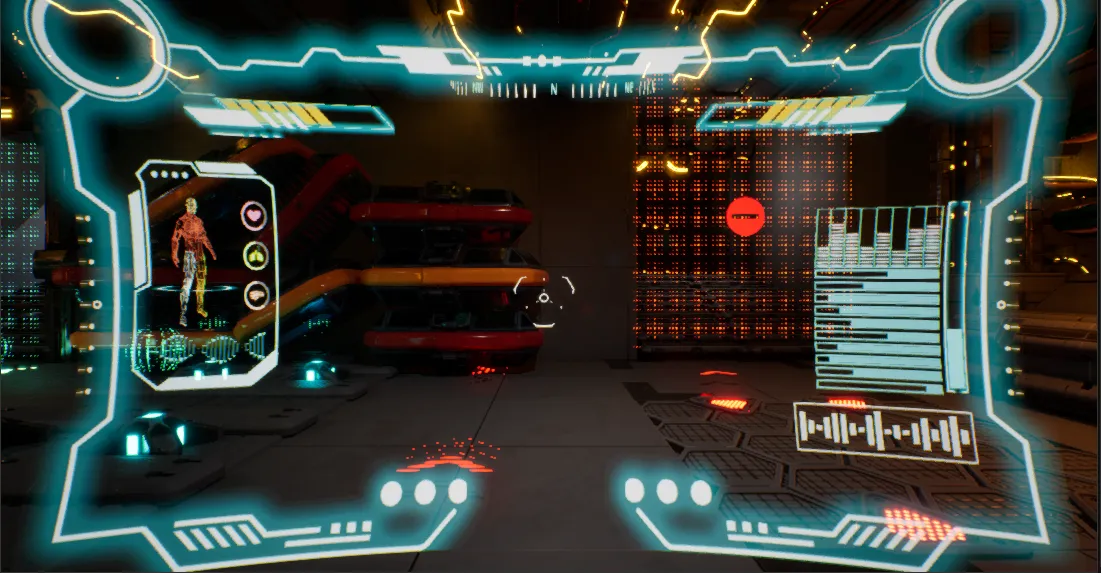
Now, when we open the UI in the game, we should see it displayed with a curved effect.
In conclusion
By applying the changes in this guide, you can create a fish-eye HUD that enhances your game’s visual style. Experimenting with different intensities and UI placements will help you strike the right balance between aesthetics and readability. Now that you understand the fundamentals, try integrating this effect into your own projects!